![]() Trampolines, climbing domes and quality outdoor games
Trampolines, climbing domes and quality outdoor games


Product successfully added
You can modify the quantity in the order summary, once you have clicked on 'Order'
There are 0 items in your cart There is 1 item in your cart
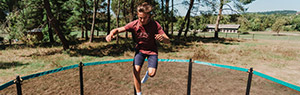
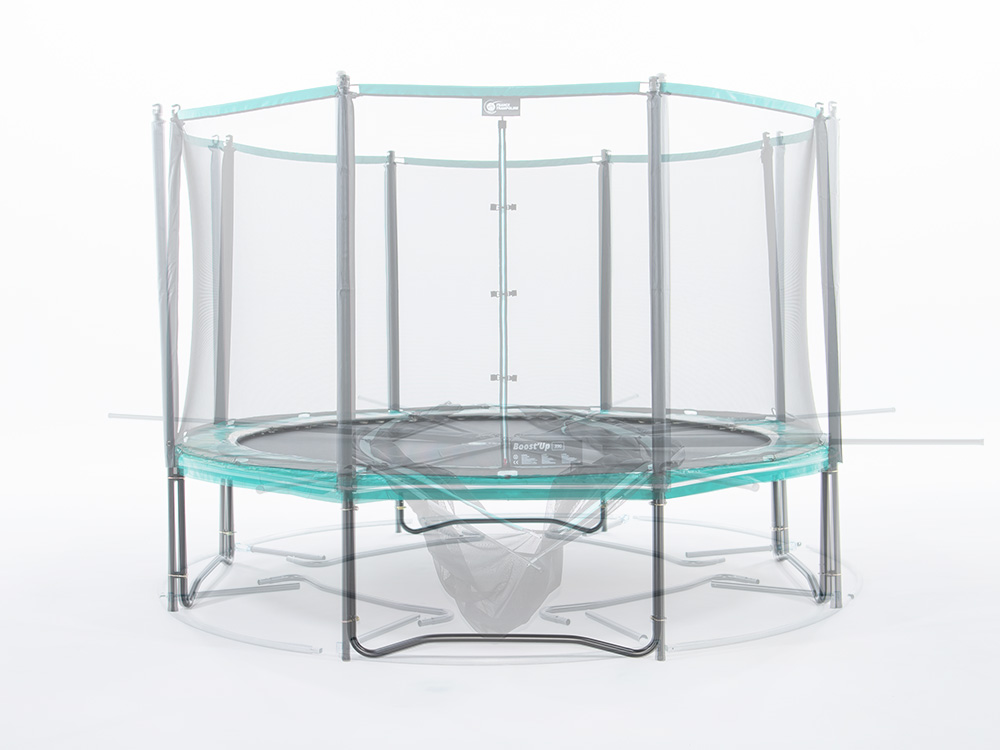
Leisure Trampoline Installation Guide
Is it complicated to set up a trampoline? Not at all! The entire structure of the trampoline is designed for easy installation.
Your trampoline is delivered with step-by-step installation instructions for easy assembly.
This Installation Guide will allow you to efficiently prepare your trampoline's installation while you are waiting for its delivery.
Preparing the installation of a leisure trampoline
Before you start to assemble your trampoline, as specified in the Buyer's Guide, it is very important to make sure you have enough room in which to set it up.
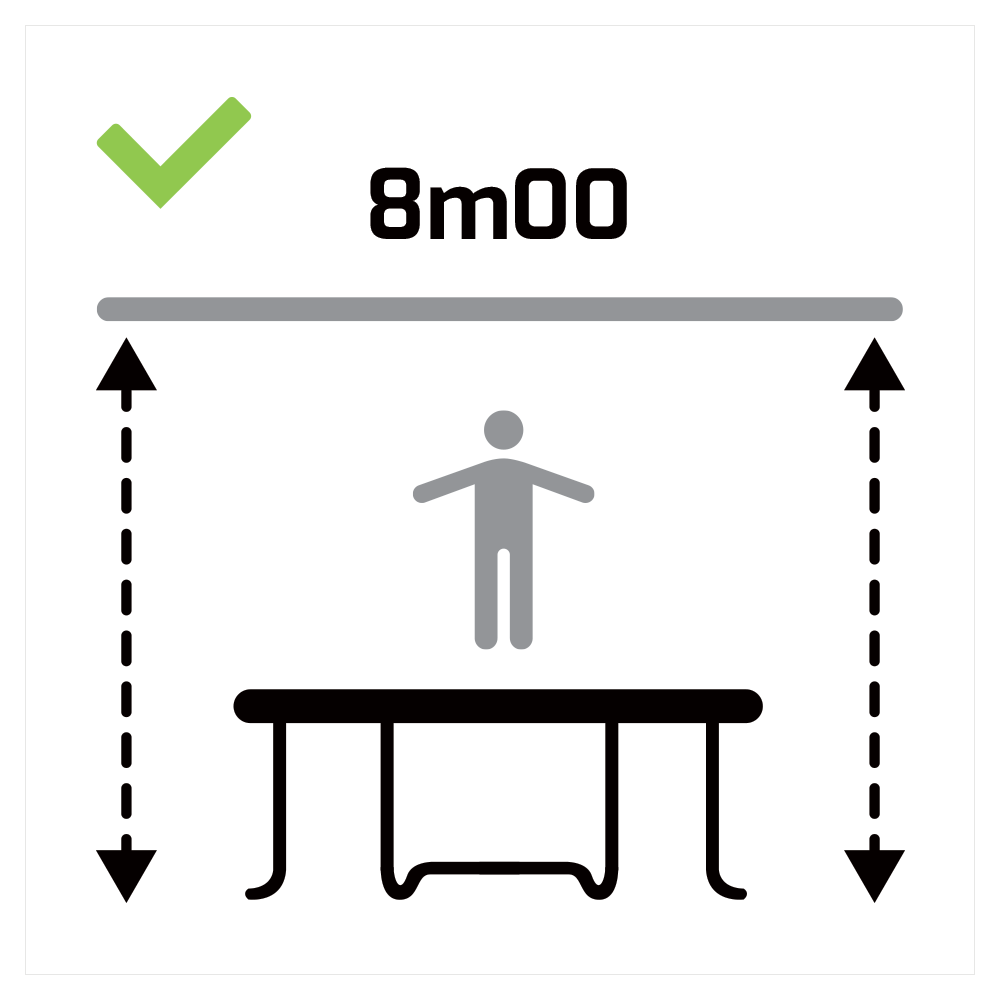
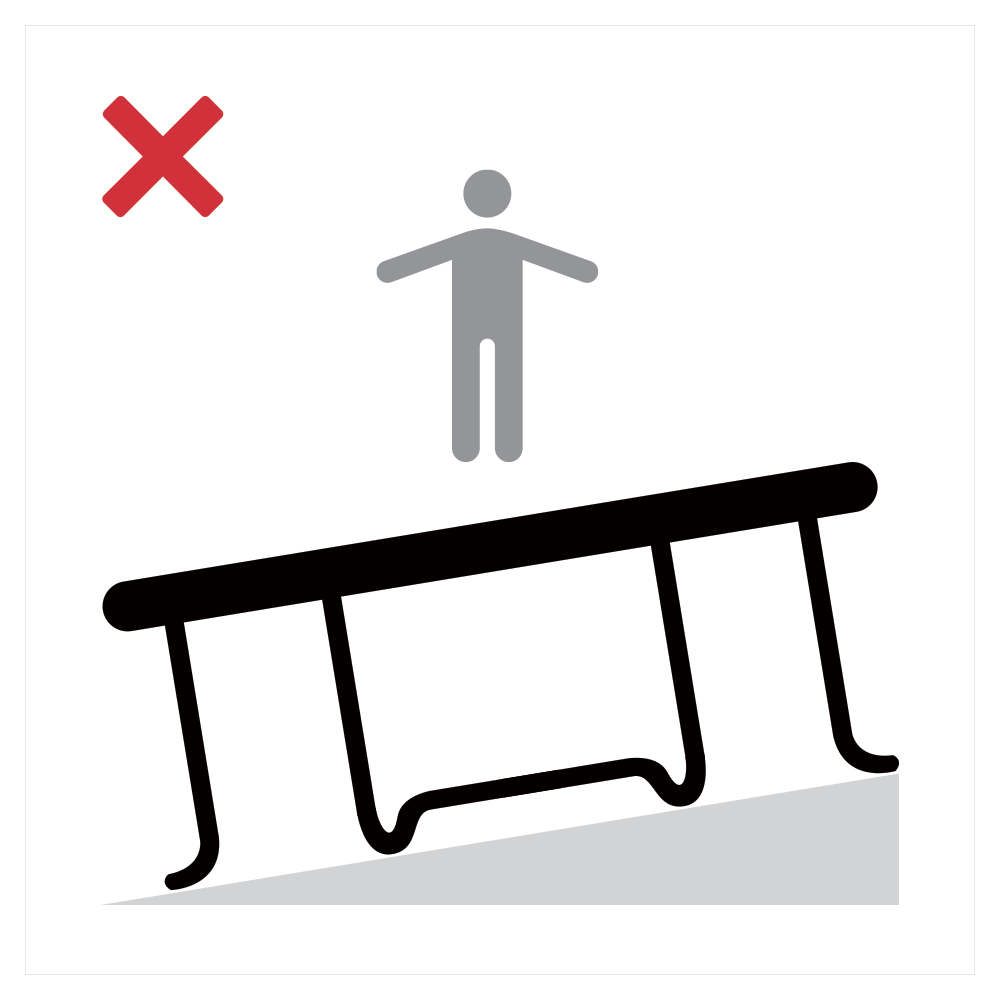
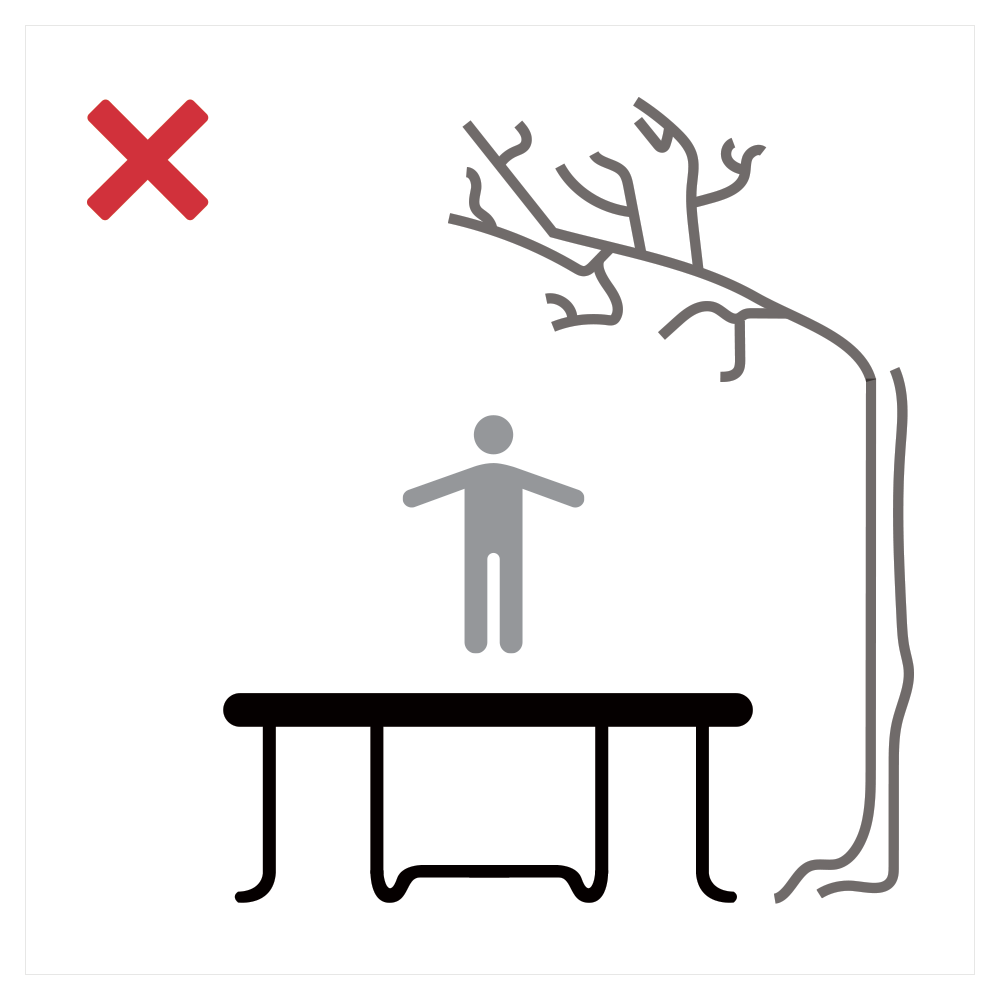

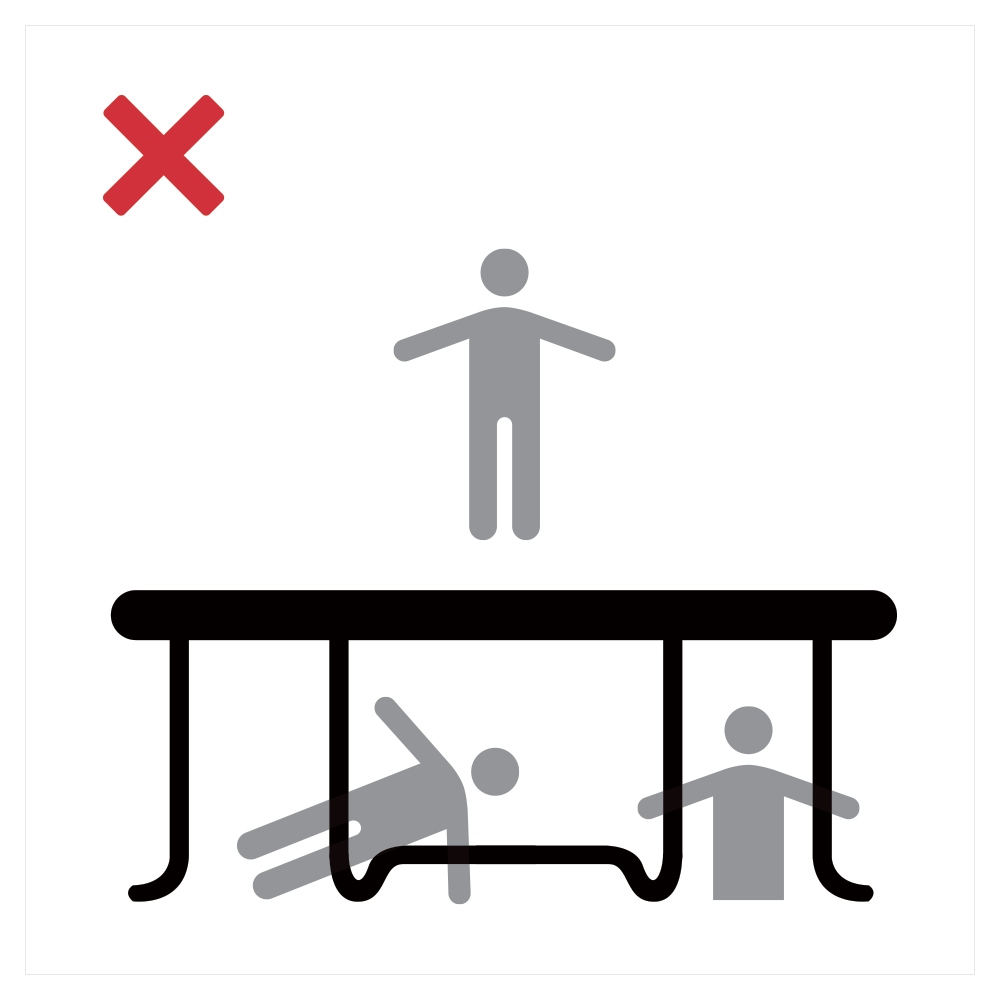

Among the other conditions to validate that are listed below, we also recommend that you check to be sure that the surface the trampoline will be installed on is flat.
Make sure the following criteria are met:
| Required conditions | Installation precautions |
|---|---|
| 8-m clearance above the trampoline | Do not install near obstacles |
| 2-m space all around the trampoline | Do not place anything underneath the trampoline |
| Flat, horizontal surface | Do not place on an inclined surface: risk of distortion |
| Cleared area, plenty of daylight | Do not install on a hard surface: concrete, gravel, tiles, asphalt, etc... |
| Away from heat sources (outdoor grills, fire pits...) |
It is very important to scrupulously follow these guidelines to use your trampoline in optimal safety conditions.
More useful information
Tools to prepare
Our trampoline packs include all the tools you'll need to assemble your trampoline.
The steel tubes that make up the frame and the legs are designed to fit together without screws or welding, for extra frame strength and to save you assembly time! However, to make the trampoline installation easier, we recommend that you prepare the following:
- A mallet: : to help you install certain parts, like the T-shaped junctions of the frame. Caution: do not force any of the parts into position to avoid bending or breaking them.
- A pair of gloves : to avoid pinching your fingers when putting together the galvanized steel frame and legs.
- A ladder or step-ladder : to help you put up the safety enclosure and let you reach the tops of the net posts.
Is it possible to install the trampoline alone?
A trampoline can be installed alone.
However, this takes time and for certain parts, such as the T-junctions or the safety enclosure, it's better to have an extra pair of hands.
We recommend that you have help when asembling your trampoline, all the while scrupulously respecting the chronology of the installation steps. Do not skip a step, and be sure to fully complete one step before moving on to the next.
You may also want to include your children in the installation process, to give them a sense of having brought their trampoline to life.
How long does it take to assemble a trampoline?
When installing your trampoline, be sure to respect the steps described in the installation instructions that come with the trampoline. If two people install the trampoline together, then installation time is approximately 90 minutes.
However, depending on the trampoline model you ordered, installation time may take longer because of the larger number of springs to install. Your leisure trampoline will remain in your garden for many years, so it is very important that the installation be carried out properly.
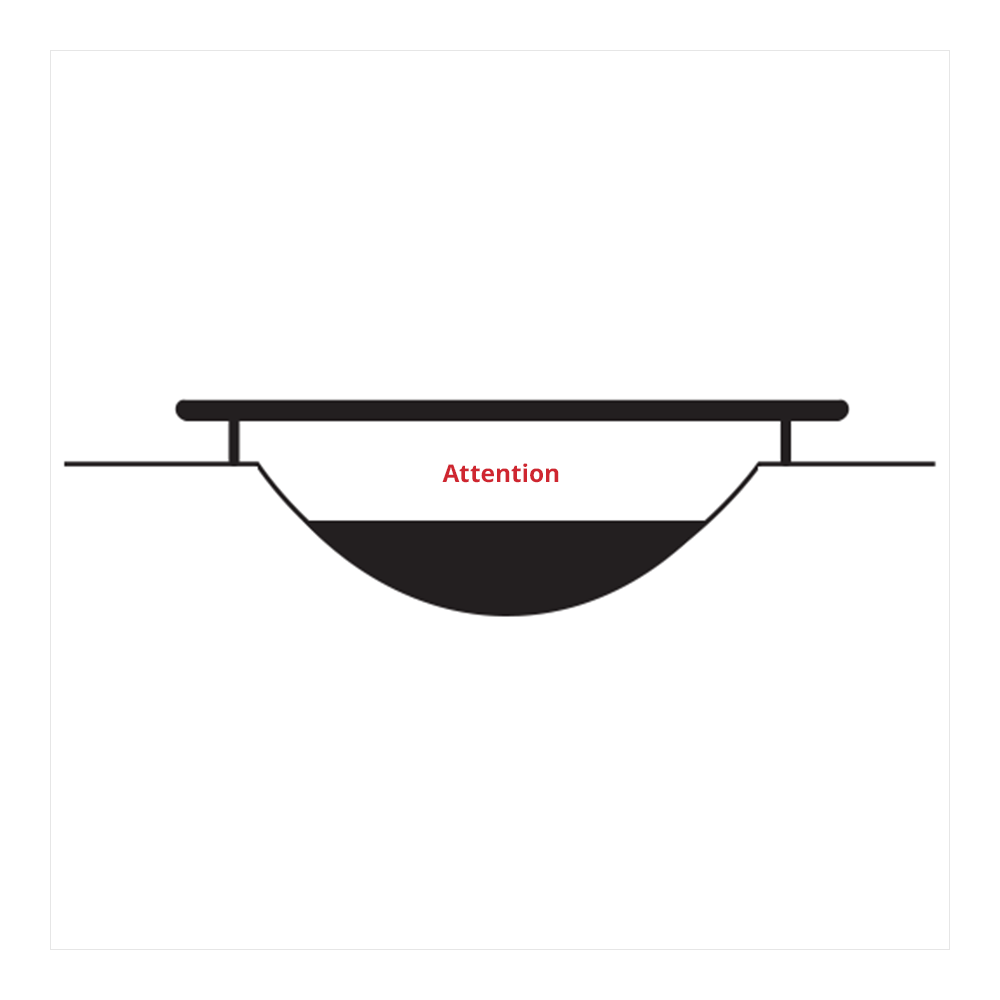
Close-up on the T-junction part
One part attracts the attention of our customers who opted for robustness. The T-junction withstands a lot of pressure since it joins the frame and the vertical legs of your trampoline.
Each part fits into two of the frame tubes and is inserted in the vertical leg tube.
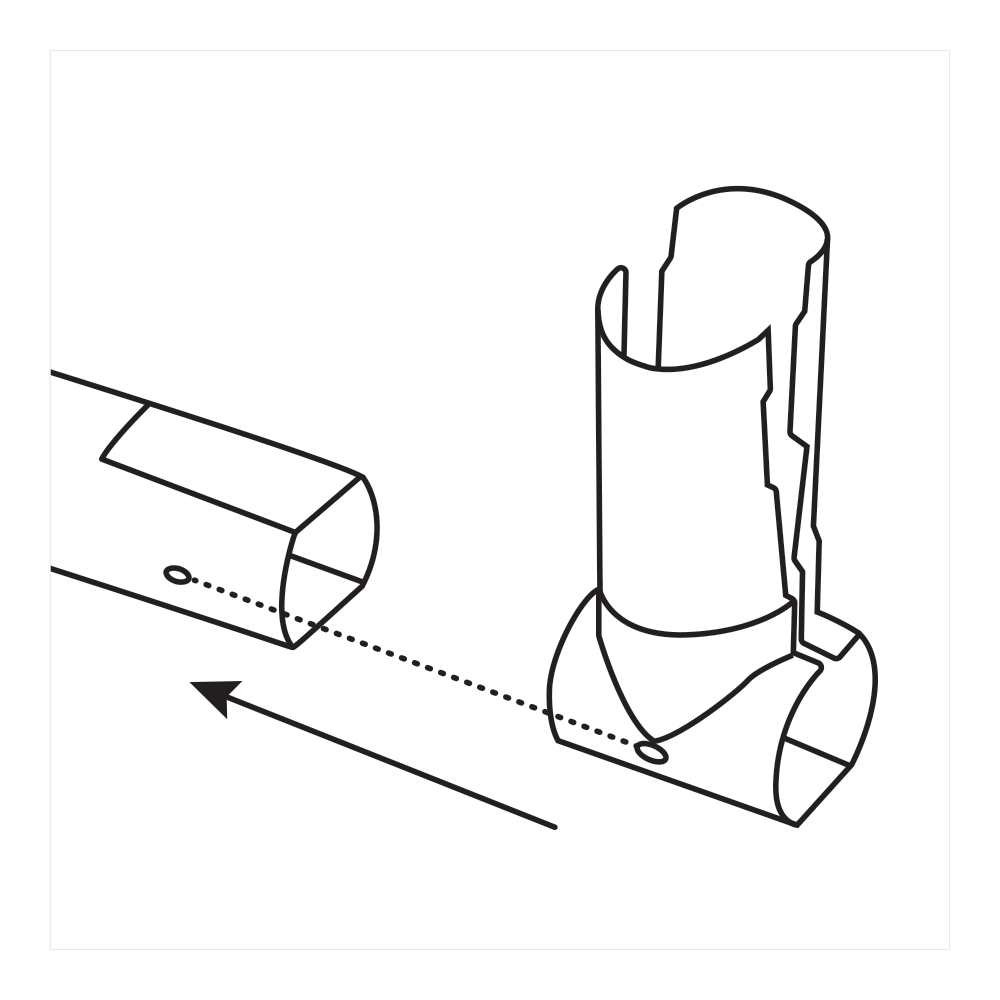
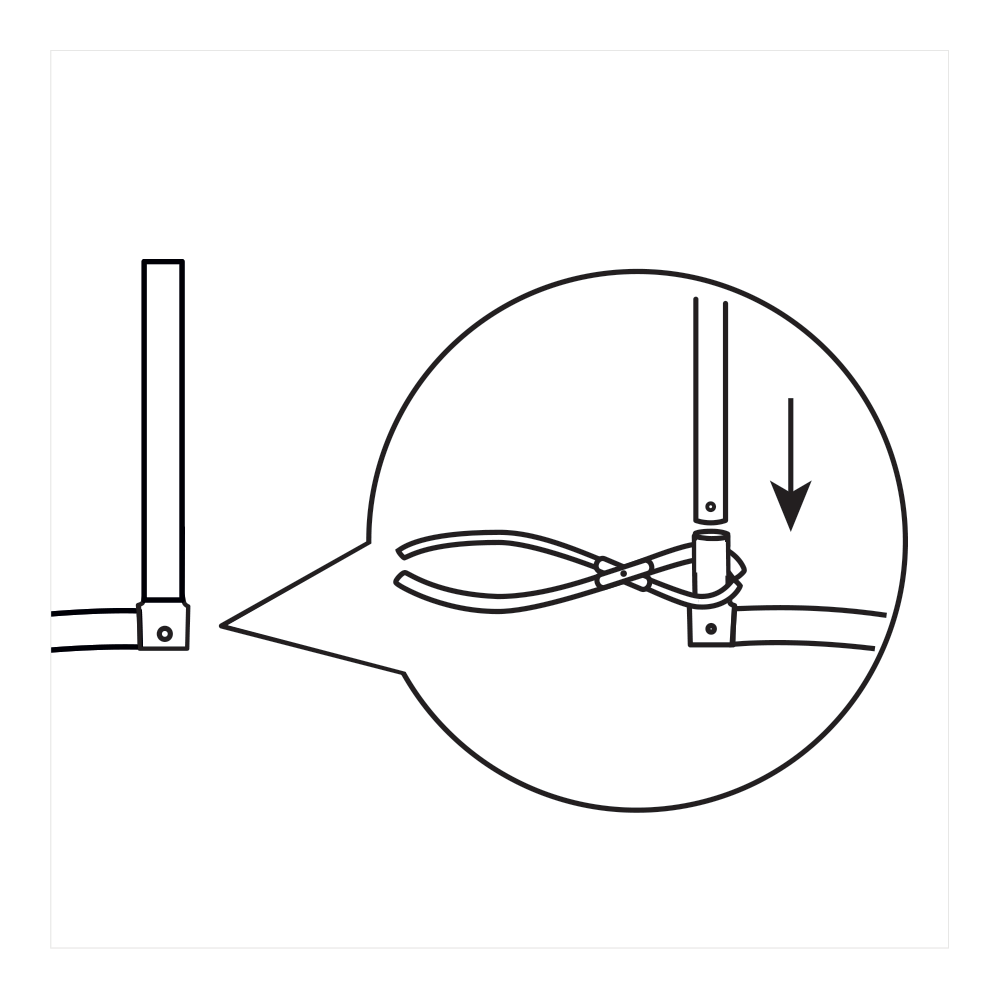
To assemble the frame, you need to place the tube with the holes close to the ground and place the junction part next to it, with its "feet" pointing upward. Next, spread apart the ends of the T-junction and place the frame tubes inside the junction. A curved opening on the two parts allows you to line them up.
A pair of pliers, supplied with your trampoline, will allow you to tighten the "feet" of the part to then insert the vertical bar of the leg. Repeat this step for all the other remaining parts, and assemble the mounted tubes to create a robust structure that will be tensioned once the springs are attached.
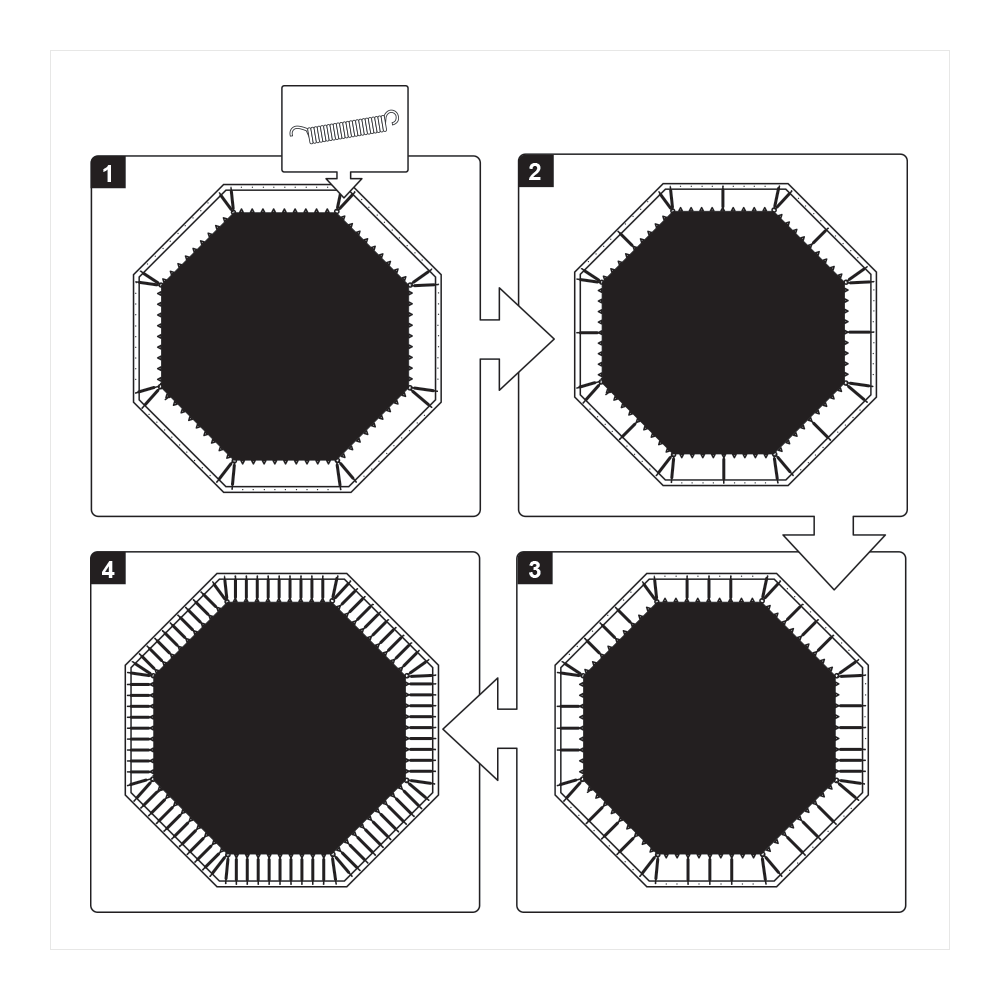
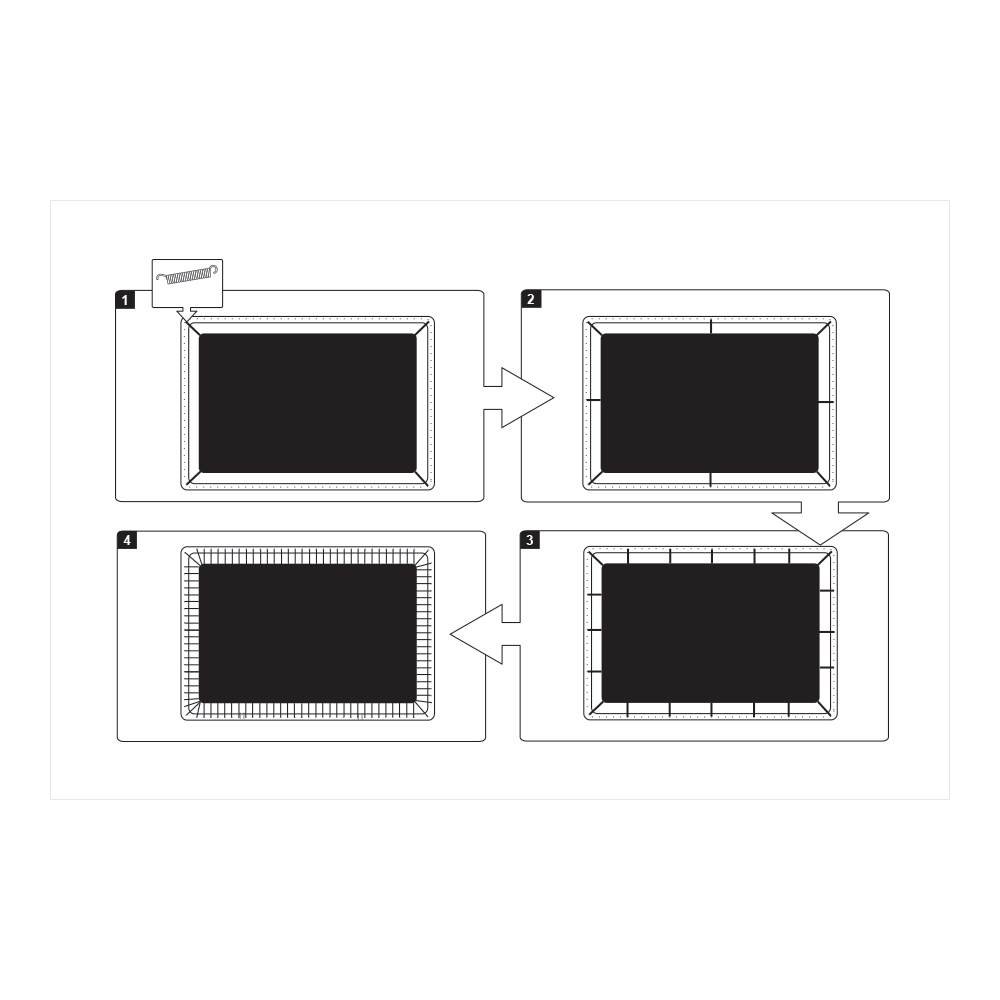
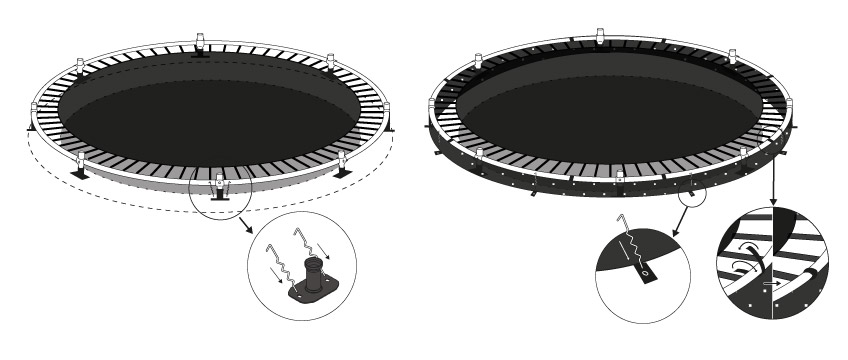
Installing the jumping mat
Installing the jumping mat is generally the most time-consuming step because, depending on the mat's diameter, there may be up to 120 springs to install.
The diagram below shows you how to evenly distribute the tension and not need to force the last springs into place. The entire structure of the trampoline is held together by the concentric strength of the springs attached to the jumping mat.


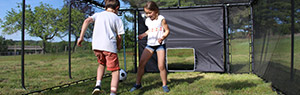
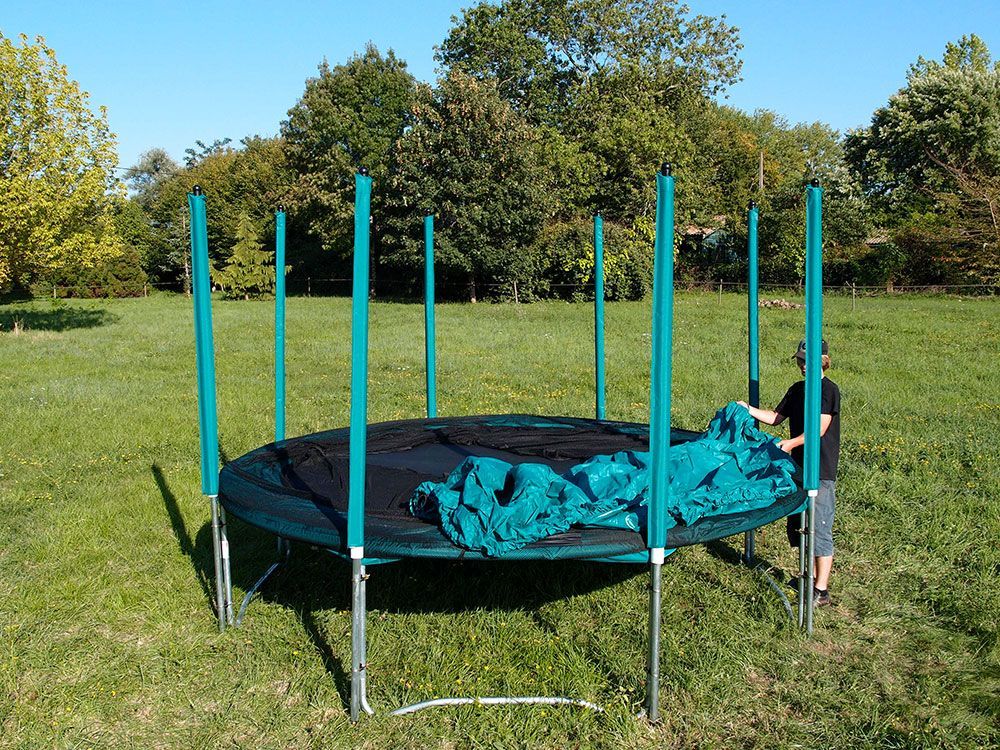
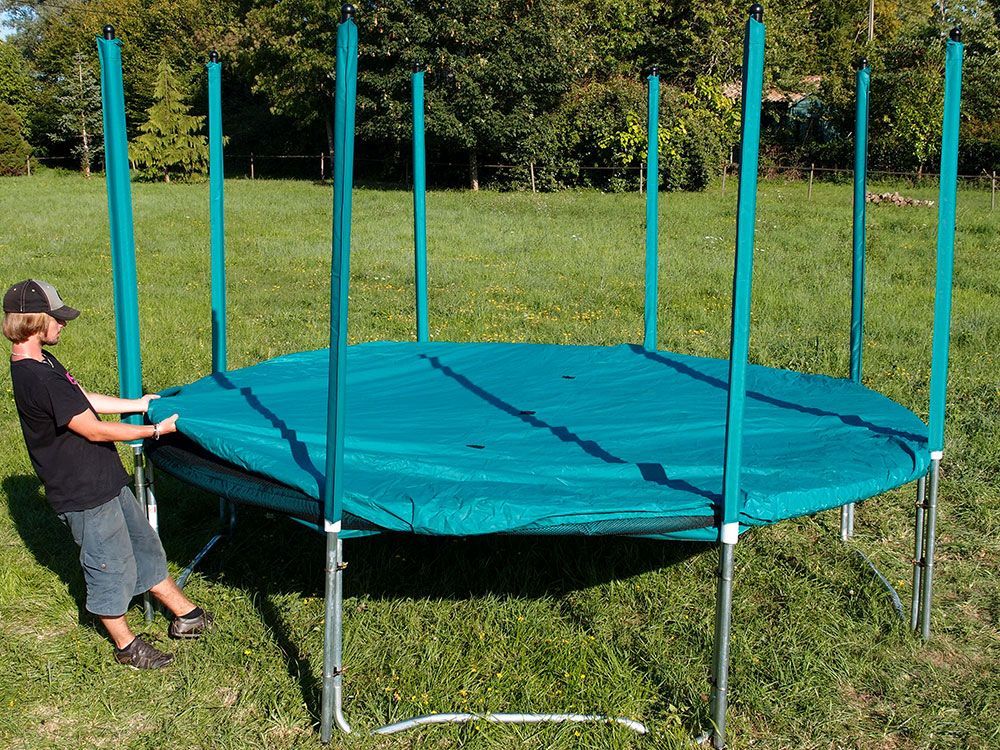
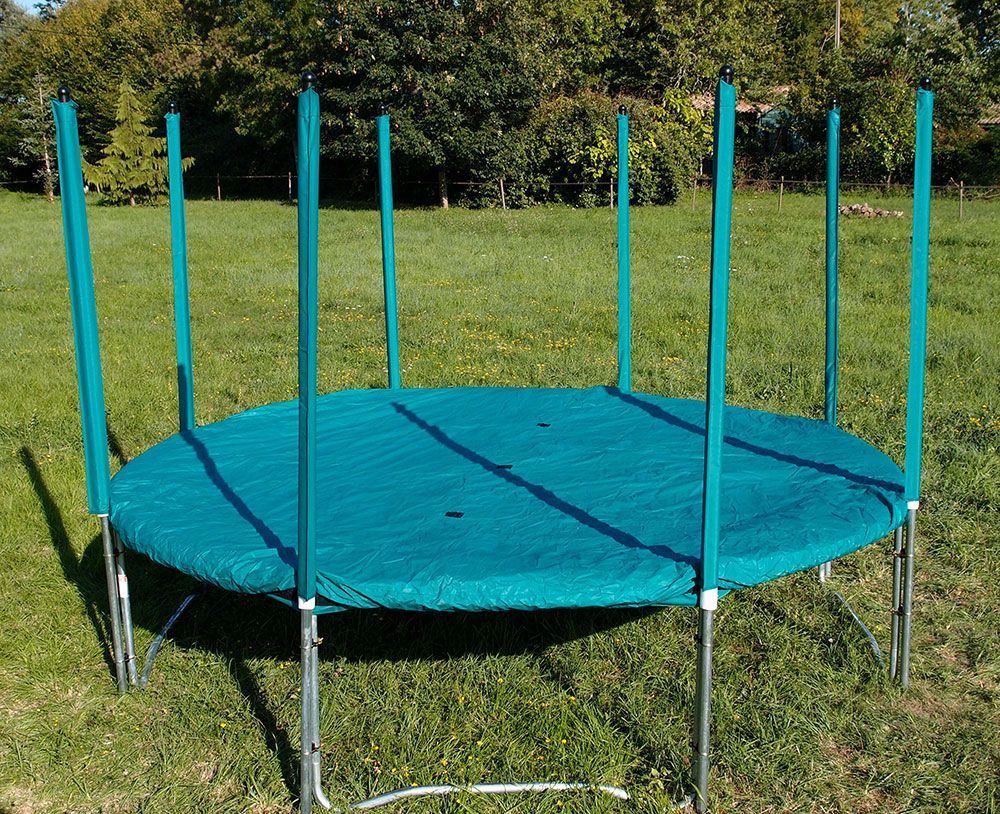
Installing the protective cover with the net
The cleanliness cover, available for all our trampolines, may be installed with the net in place, but it is generally easier and quicker to install it with the net down.
On our trampolines, the net posts remain in place, but the fiberglass rods holding the net up at the top should be taken down and placed on the frame pad.
Slide the protective cover between your curved frame and the net posts, and then firmly attach the protective cover to the trampoline using the sewn straps equipped with hooks.
>> Watch our tutorial video on installing the protective cover with the net below!
In just a few minutes, your cover is installed on your trampoline with its safety enclosure.
Trampoline installation video
Installation instructions are included in each trampoline and safety enclosure shipping box, but you can find below a video showing the installation of a round trampoline (the installation procedure is identical for all trampoline models).
For any questions, please call us on +33(0)5 56 36 04 62 (no surcharge).
Installing a Mirage (in-ground) trampoline
Would you like to offer your family an in-ground trampoline, with a more discrete, minimal look than a classic one? Although it is quicker to assemble this trampoline than it is a classic model, you need to prepare the ground prior to installation.
1 - Preparing the ground
To begin with, mark off the area in which you'll place your trampoline. Make sure that there are no obstacles nearby, and that the ground is flat.
In order to mark the area to be dug out, the Mirage 360 and 430 Inground trampolines are delivered with a measuring strap.

For the Mirage 360 the strap measures 1,57m. For the Mirage 430 the strap measures 1.87m.
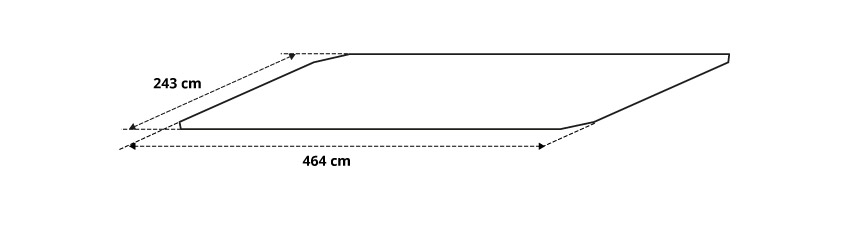
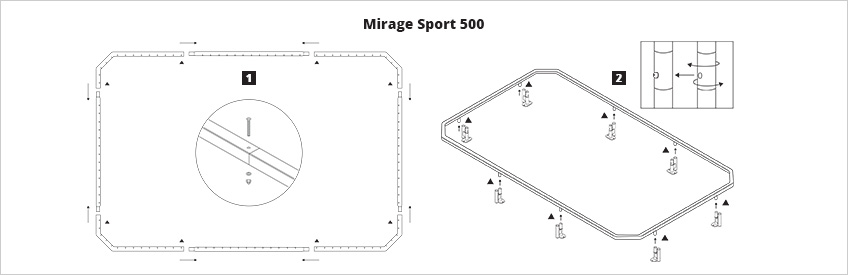
For the Mirage Sport 500 trampoline, you need to dig a hole measuring 2.43 m x 4.64 m.
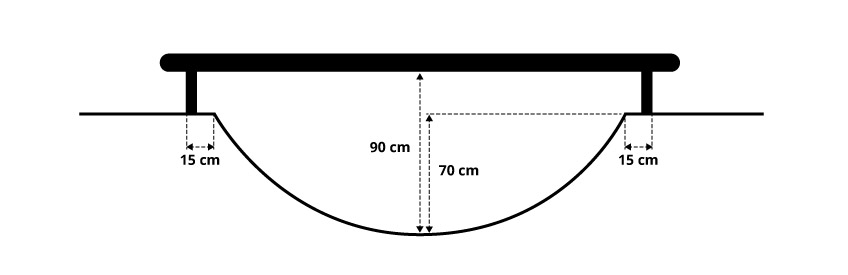
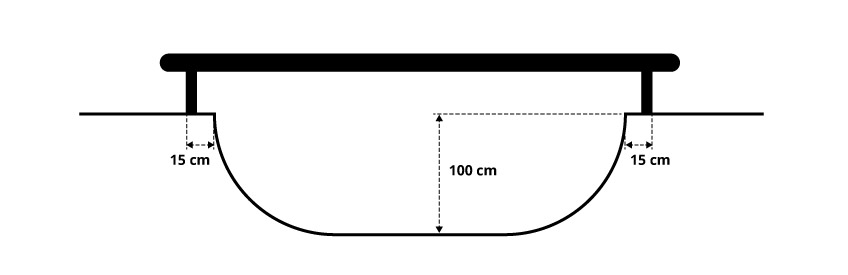
Before digging, please be aware that your trampoline will have his legs postitioned above-ground :
Round in-ground trampoline :
Mirage 500 Sport in-ground Trampoline :
2 - Assembling the structure
Procede with the assembly of your in-ground trampoline's galvanized steel frame.
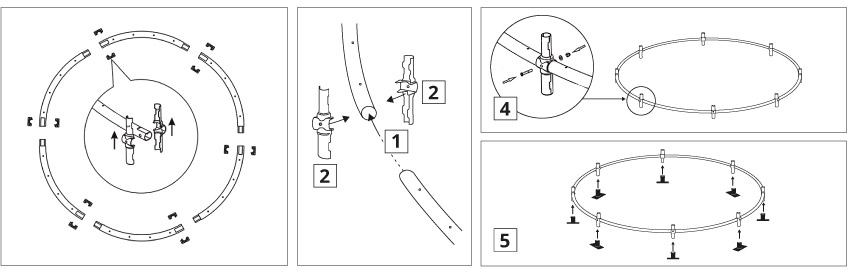
Place the jumping mat in the center of the trampoline frame. Attach the springs by starting at the 4 cardinal points. Once all the springs have been hooked on to the jumping mat and the frame, place the trampoline over the hole.
3 - Check the drainage system
If the ground does not drain naturally, it is recommended that you cover the bottom of the hole with gravel to guarantee progressive water drainage.
If water does not drain well into the ground, you will need to install a water pump to evacuate the water properly. Undrained, stagnant water could impede jumps and give off unpleasant odors.
4 - Attaching the structure
Fasten the trampoline legs to the ground using the provided hooks.
Install the protection skirt around the trampoline legs, and attach it to the ground with the rest of the hooks provided.
Install the protective pad and the safety enclosure.
Your in-ground trampoline is now ready to be used year-round.
Did you not find what you were looking for?
We will call you back at no charge and answer your questions.